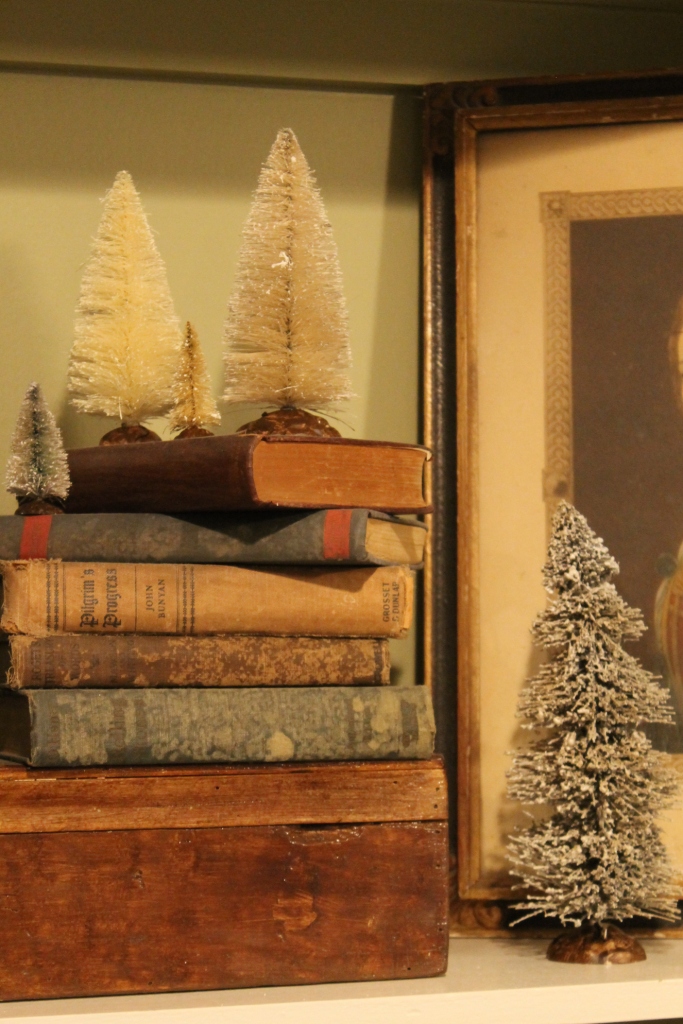
What I originally had in mind for wreaths that would go
with my bottle brush tree mantle vignette was larger
versions of these tiny fuzzy wreaths:

These little wreaths are about a couple of inches in diameter
and made for doll houses. Their tiny bows did not fade a bit
in the water/bleach bath that took all the green color out
of the main part of the doll-sized wreath.

To try to mimick that look, I got trial supplies that consisted
mainly of wreath forms and Christmas garlands and spray paint.

For the bottom wreath, I was hoping that if I stood the prongs
of the wreath straight out from the form, it would look like
lots of little bottle brush trees in a circle.
Another attempt was with tinsel garland and a left over
pool noodle wreath form.

Opps! The gold garland wasn't long enough to go
all the way around. Had to finish with green tinsel garland.

To attach the garland to the foam, I made little
"U" shaped pins out of floral wire and pushed it on
top of the garland into the foam.

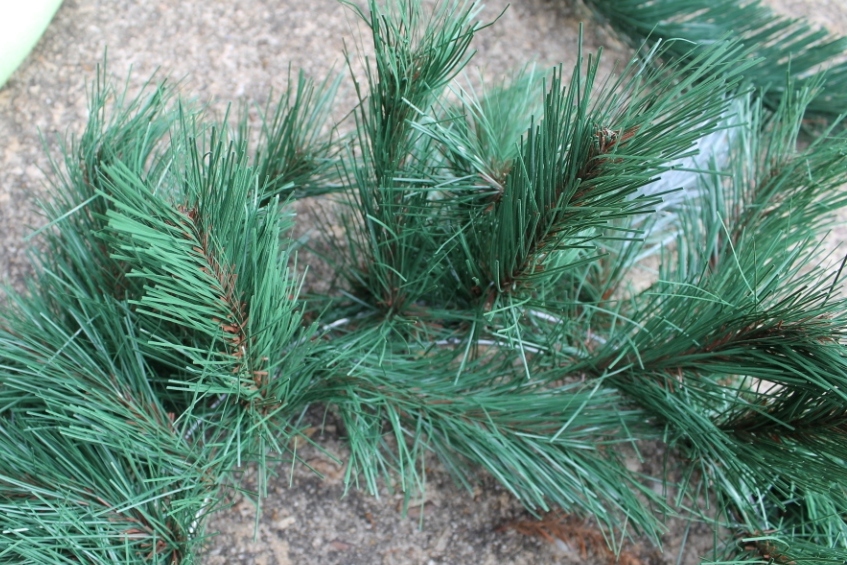
Another idea was to wrap artificial pine garland around
a wreath form. I had this little wreath from Dollar Tree so it
got used in the experiment.


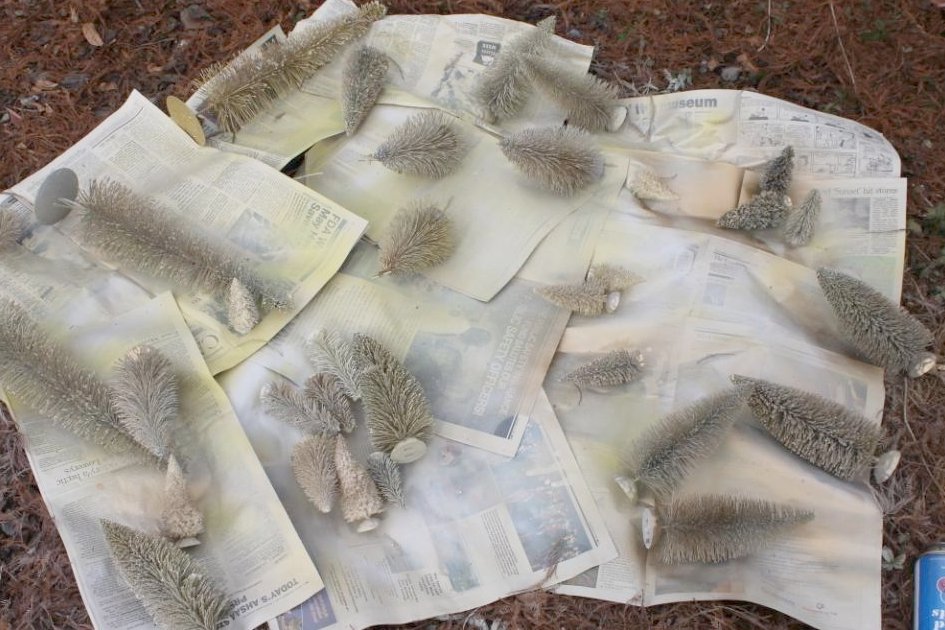
I had earlier tried to copy the bleached out look of
bottle brush trees on non-bleachable trees with spray paint,
so I used the same neutral paint colors on the wreaths.


Just like the little red bows on the doll house wreaths,
I found that it is hard to change the color on these
synthetic materials made to copy natural ones.
It's like trying to paint on plastic.
The wreaths never got to a warm color no matter how
many different colors of spray paint I tried.
Since the materials I tried for the wreaths didn't
really give the look I wanted, I decided to just glue some
spray painted bottle brush trees on top of the wreaths to more
or less just cover them up and make them background.
That would officially be a bottle brush tree wreath, right?
I have seen the large real bottle brush wreaths in pictures
but not in real life. Are they hard to find or expensive?
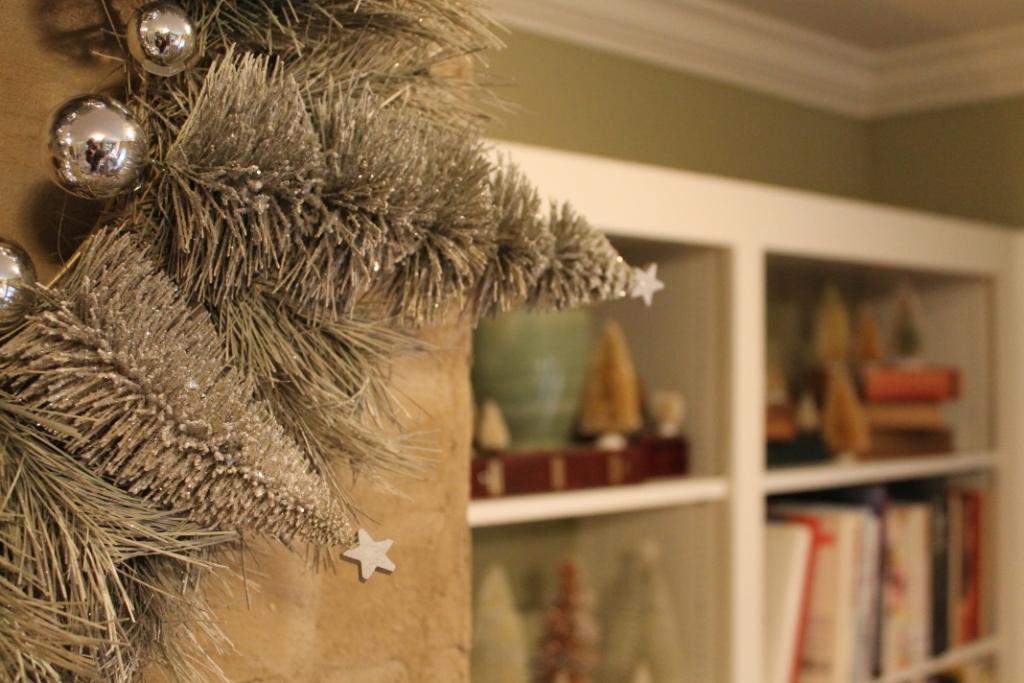
After a good dose of spray adhesive and glitter on each tree
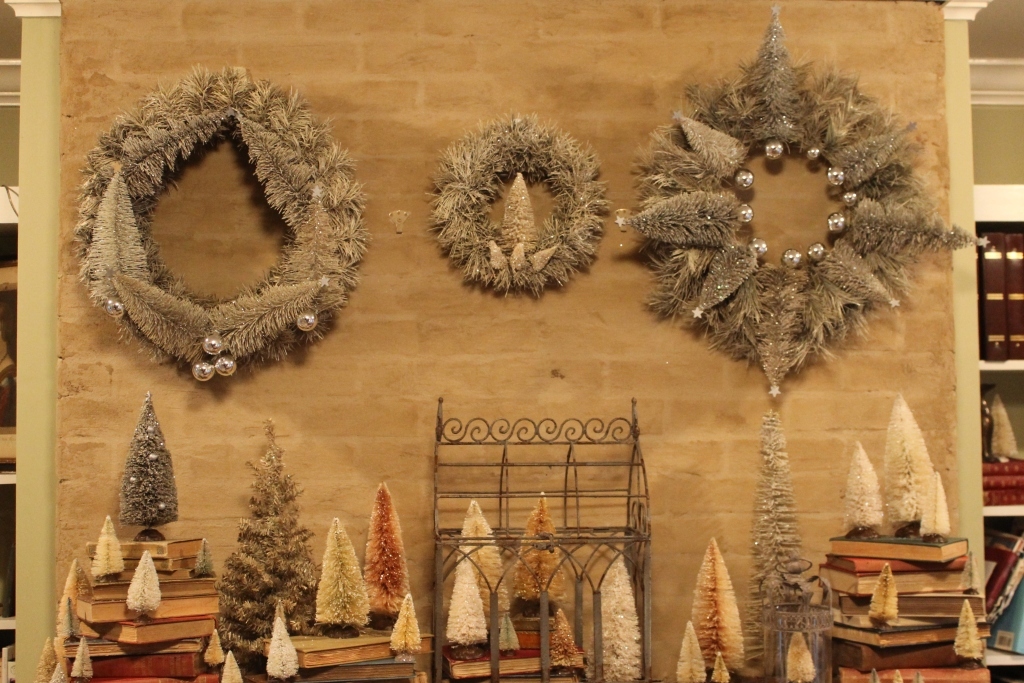
and each wreath, I ended up with three different configurations.

The largest wreath turned out to be one where the pine
prongs looked like smaller trees behind the large glued on ones.

The wires on the trees were hard to cut off so I covered
the wires with silver ball ornaments.


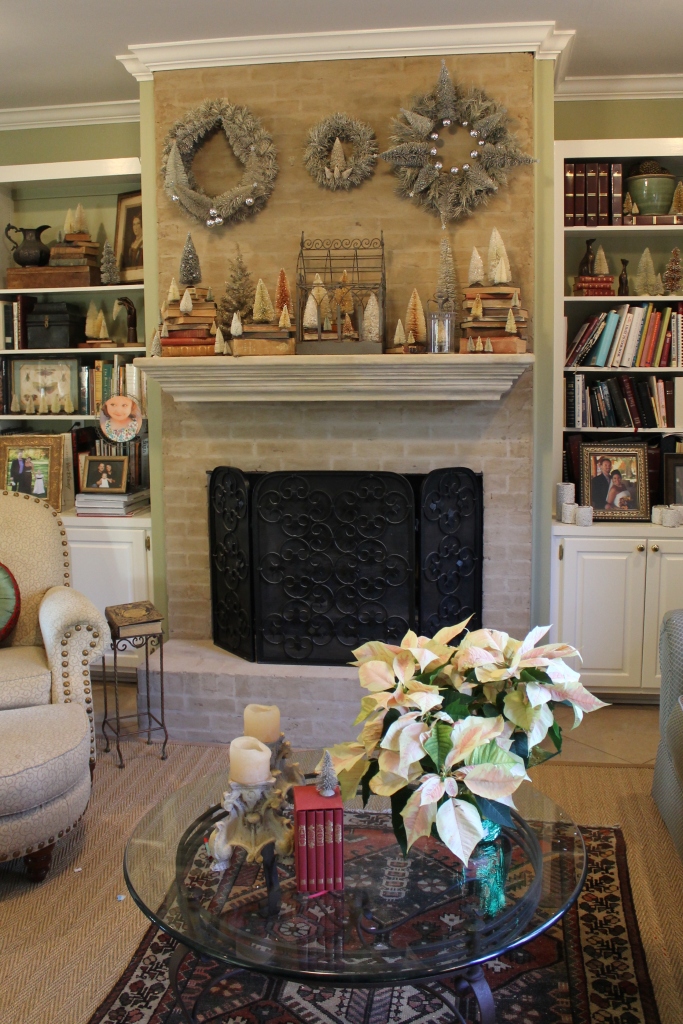
I was semi-pleased with the look of the smallest wreath
so I didn't try to cover it up as much with trees.


The wreath made with tinsel garland got trees glued on
around its circumference.

I probably should have smushed the trees down more into
the wreath and curved them a little more...maybe next year.


In the end, I was happy with the overall look of the
wreaths with the little bottle brush trees on the mantle
even if they did not turn out like I had originally hoped.

If you would like to try this idea next Christmas,
here is a photo to add to your Pinterest board.

To see more info on bleaching the bottle brush trees and closer photos
Another post that shows how I painted and embellished the bottle brush trees
I bought that did not want to bleach out, is "DIY Glittering Bottle Brush Trees".
I bought that did not want to bleach out, is "DIY Glittering Bottle Brush Trees".