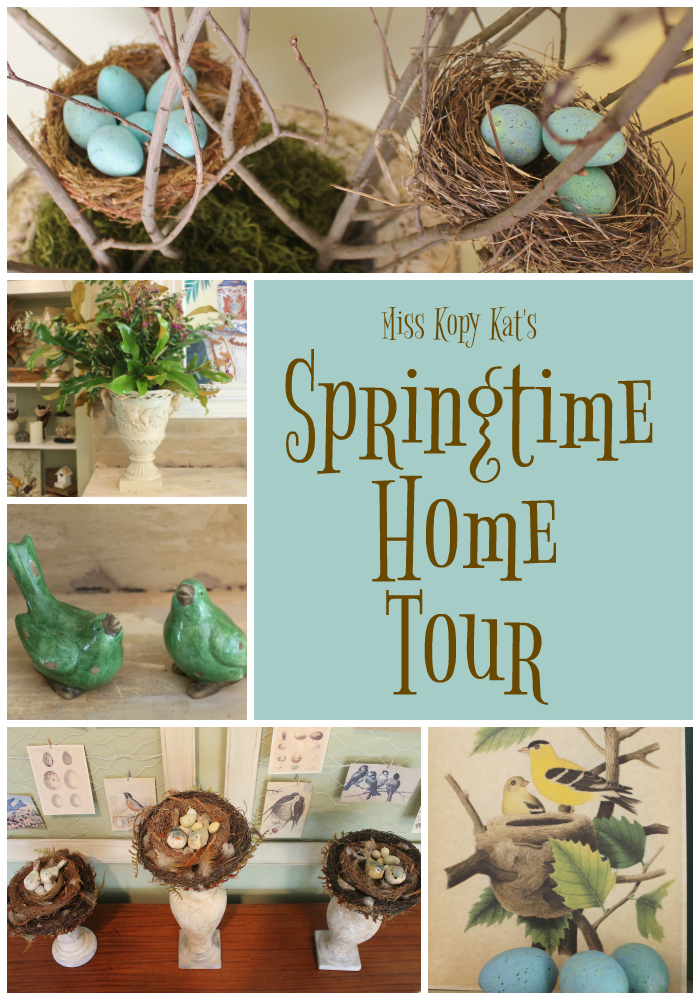
Come on in! I'd like to show you my bird-themed decor in my
home. Then (if you care to stay) I'll show you an easy way
to make eggs (real or fake)
look like wild bird eggs for your decorating.
We'll start in the living room.

The mantel holds two bird urns that used to be dark brown.

Soaked Oasis-type wet foam blocks were placed in the urns
and then clippings from the yard were stuck in the foam.

I've used the urns much more often now that they have
been painted a lighter color with chalk paint with dark
wax rubbed on. The details also show up better.
wax rubbed on. The details also show up better.


This pair of ceramic birds get a place of honor
on the mantel too since they are my favorites.

The smaller bookcase has small wooden birdhouses
on each shelf. They came from various craft stores
and were given a coat of acrylic or chalk paint.

The birdhouses usually are very inexpensive and
are a good way to help carry out a bird theme.

Did you catch the wooden "bird in hand" in the picture above?

More bird-related items are continued on the
double bookcase.

This vignette describes my life right now...empty nester.

This vignette describes my life right now...empty nester.

The text on the bottom of the bird image reads
"You can't help the birds from flying over your head but
you can keep them from making a nest in your hair."
That quote is attributed to Martin Luther.

Hmmm...I've tried to make up a story in my mind of what
is going on with these three expressive different colored
birds on a branch. What do you think?
is going on with these three expressive different colored
birds on a branch. What do you think?


I don't love how the artificial candles look on the book-
shelves during the day. They are set on automatic
timers and come in the evening for several hours.
They give a warm and cozy glow the the bookcase area.
This plaster milkmaid on the table in front of the
double bookcase has some artificial wild bird
eggs in her basket.


The pillows on the sofa were made a couple of years
ago when I also had bird theme decor for Spring.
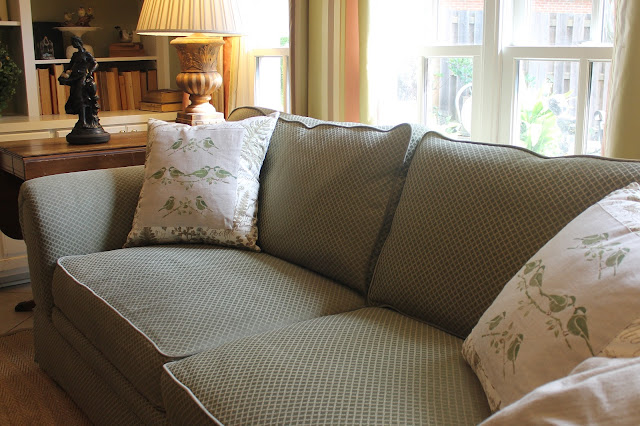


If you want to see how they were made you can
click on this blog post. Making pillow covers
that can be changed seasonally keeps your decor fresh.
Also in the living room is a credenza. Sometimes the
frames above it hold seasonal artwork but right now
they hold chicken wire.

Lately I have been changing the images on the chicken
wire to fit the season. It is easy with tiny clothes pins.


The Bible has lots of references to birds in it in order
teach us about God's love and care for us. Two of my
favorites were printed out on burlap made to run
through printers (from Walmart $1 each).
The images of the birds were downloaded to my computer
from The Graphics Fairy website and then printed out.
Little "mushroom" bird couples guard their eggs
in nests atop painted candlesticks.

The candlesticks used to be pink in the middle. They were on the clearance shelf at Hobby Lobby.
My sister from North Carolina visited recently and
brought me these great branches of pussy willow.

I put them in an urn to use on the buffet in the
dining room/foyer.
There was actually an abandoned nest in one branch.
That helped spur me on to get my bird decor out
of the attic and put it back out again this year.

More bird nests (some real, some fake) were also added to
the branches. Eggs were painted to put in the nests.
On the dining room table is a scale that was
purchased from Magnolia Market. It holds fake eggs that
(except for the blue ones) came already speckled from
assorted craft stores.


I love speckled eggs but they
are harder to find and usually cost more.
Read further down in this post to see how to
make your own inexpensively.
In the glassed bookcase are more bird images also
from The Graphics Fairy. These are printed on full
sheets of paper to take up more room on the shelves.

It is hard to get pictures of items behind the wavy
glass of the bookcase so I will open the doors for you.


These birds were printed on cardstock to they would be sturdy enough to stand up on
their own by leaning on a tall drinking glass behind them.


The kitchen table holds a wooden dough bowl with nests
and painted two-piece plastic Easter eggs. They are a
work in progress...don't judge them...yet.

I'm working on a technique to get rid of that raised line
work in progress...don't judge them...yet.

I'm working on a technique to get rid of that raised line
that happens when the two pieces of the eggs are
snapped together. It's harder than I thought it would be.

The "coffee and wine bar launderette" has a bird theme
year-round. The fabric with stylized birds and flowers
makes the curtain and the counter skirt in that room.


To see more photos of that room in the house click on "The Transformation of a Laundry Room".
Well, the bedrooms don't have any bird decorations so
lets move on to painting eggs to look like wild bird ones.
You can certainly use this technique on real eggs.
Real eggs that I had blown out and painted did not hold
up well for me in storage. It was a bummer to spend time
painting the eggs and then they were broken by the next year.
the past couple of years is plastic eggs
that do NOT have a line across the center!

Also this past Easter I found small styrofoam whole eggs
at Dollar Tree. They do have a kind of weird honeycomb
design in the foam but it can be disguised by paint.

Get acrylic paint(s) in the color(s) that you want your
eggs to be AND a bottle of the color you want your speckles.

Paint your eggs. You can do a solid color. I like to
do a few watered down "washes" of paint color
and build layers of color. Even if you want
neutral color eggs you could used different off white
shades. It just makes the eggs look more realistic.

Sorry...I love blue/green eggs...google "wild bird egg image"...you will see lots of other colors to aim for.
Here are my painted eggs ready to speckle.
Try not to have brush strokes on your eggs by brushing
crossways over any obvious strokes before they dry.

Not all wild bird eggs have speckles but a lot of
them do. Adding speckles is easy and builds in
another layer of realism. Here are some Audubon-type
prints showing speckles on bird eggs.

prints showing speckles on bird eggs.

I recommend doing the speckles outside.
Dip an old toothbrush into not-watered-down
brown (or your choice of) acrylic paint.

Aim your brush towards (but don't get too close to)
your painted eggs. Put your index finger at the
tip of the toothbrush and pull it back across the bristles.

One "loading" of brown paint will speckle several
runs of your finger over the toothbrush.

The largest eggs in the picture above were already painted a solid color blue when I bought them.
I did not repaint them with watered down color layers. They looked better after getting speckled.
When the speckles get too small, reload the tooth-
brush with paint.

Have a paper towel handy to dab any speckles that you
feel are too big. Try not to wipe a big speckle...it will
smear all the speckles around it.
I started out speckling the whole batch of eggs which was
fine for one side. After that side of speckles was dry I
picked up each egg for the other side of speckles but
you could just flip them all and do both sides as a batch.

Thanks so much for visiting my Springtime Home Tour!

Thanks so much for visiting my Springtime Home Tour!